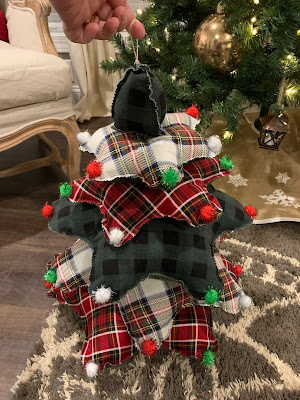
I looked and looked, and while I found so many trees I LOVED, all of the directions were in a foreign language and none had a "good" pattern. I was able to use one of these, and make it work.
The best way is to PRINT the quarter piece on a full sheet of paper FOUR TIMES! Tape them together to look similar to the one on the right, and then use it as your pattern.
This is the bottom - you can see the button. This was just to give the fabric some support and not tear through. You can also see the fabric looks a "Little Lumpy". That's because I added some rocks in the bottom pillow to give it some base support!
Cut two of Each line.
Sorry but I don't have a pattern for the top little piece... I just cut four triangles, and a square for the bottom, and just made a little pyramid pillow or the top.
I chose felt for the material, and used the same fabric for the bottom of each pillow, and a contrasting fabric for the top. I cut the edges with a pinking sheer, and just sewed the right sides out and left the "rough looking" seem to resemble a tree.
Here is the Finished Tree!
To assemble the tree, I used nylon twine and an upholstery needle. Starting with the top piece, I sewed from the bottom if it down through each pillow, and through a button at the bottom. This is the bottom - you can see the button. This was just to give the fabric some support and not tear through. You can also see the fabric looks a "Little Lumpy". That's because I added some rocks in the bottom pillow to give it some base support!
When I finished the cord at the top, I made a little loop which has proven to be a brilliant decision! Little boys love to carry things around, and this hauls the tree safely using the support of the string!
Such a cute little tree!


